
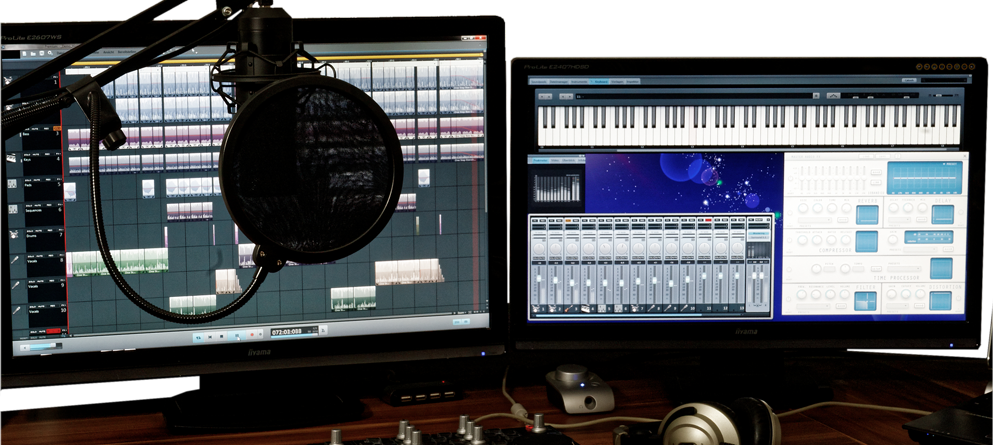

In this second audacity training I want to cover a couple of tricks you can use to improve the quality of your recordings.
Add Authority & Passion To Your Voice Using The Tempo Change Effect
The first is using the tempo function to add passion to your voice. You can also use this method to help you get better pronunciation in your voice if your English isn't so good.
And so in the two scenarios just mentioned you speed the tempo of an audio recording spoken at a normal pace to add passion and authority to your voice. And to correct bad pronunciation in your voice you simply speak at a slower pace as you record the audio then change the tempo to bring the pace of the voice back to a more listen-able pace.
So for both above mentioned cases record your audio either:
- At a normal pace.
- Or slower than normal if your English isn't great. (this way by increasing the tempo you can bring the speed of the voice to a more normal pace without altering the pitch of the voice as is usually the case when you speed an audio track up).
So lets get started with this first little trick or tip:
Once you have recorder your audio as described in the previous audacity training, click the Left Side of the Track to select the whole recorded audio track.
Then from the main menu choose the Effects -> Change Tempo option...
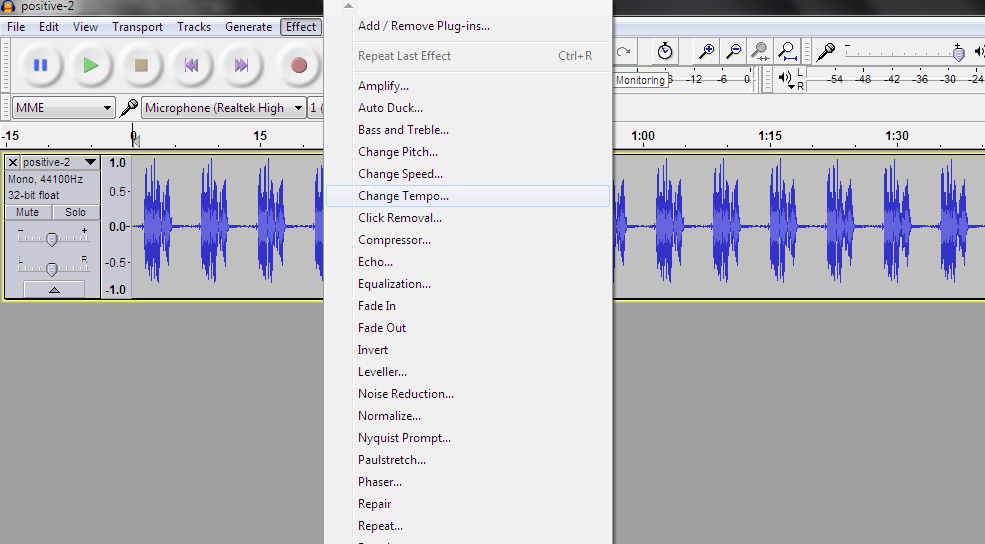
...and the following window will open.
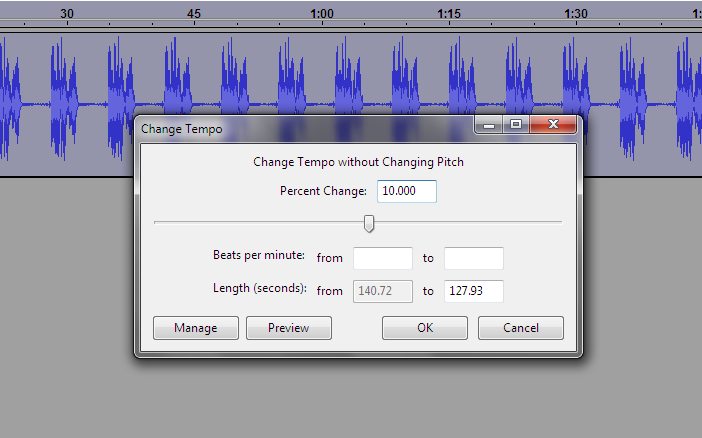
In the "Percentage Change" field type 10% to start and then click the preview button. If the audio sounds only slightly better or different type 13% and click the preview button again. Test different percentages to take the tempo up until the sound begins to sound like Mickey Mouse. As soon as the track starts to sound like Mickey Mouse you know you have gone too far.
You will then need to take away a couple of percentage points and then click the OK Button once you are happy with the previewed result. But don't worry if you get it wrong you can always undo the tempo change and start again by going to:
Edit -> Undo Change Tempo.
When the audio tracks tempo as been increased listen to it and you should notice two things.
- First, your voice will sound more passionate as you are listening to it.
- Second, you will sound more authoritative as you are speaking at a slightly faster pace than normal, but not too fast. This makes you sound more authoritative regarding the subject matter.
You can change the tempo of the audio in percentage points and try different percentages to test the sound.
This is a great way to add authority to your voice or simply add more passion to a dull voice. Try it for yourself and see.
And of course if your pronunciation is not so good when you speak at a normal speed you can record the voice at a slower pace than normal and concentrate on the pronunciation of each word. When you change the tempo of the voice you then hear a well pronounced voice speaking at a normal pace.
However, there is one point to beware of:
That is, whether you are recording at a normal pace or a slower pace in order to correct your pronunciation, sometimes you may speak short phrases within your text slightly faster than others. These are the parts of the audio that will begin to sound like Mickey Mouse first when you start to increase the tempo percentages.
Recording at a normal pace the threshold for such Mickey Mouse changes is usually about 15% and so I normally change the tempo about 13% or slightly more if I can get away with it.
If you are recording your audio at a slower pace to correct pronunciation you may increase the tempo to more. 20-25% but again experiment to find the perfect balance for your particular voice or audio track.
Creating Chains of Events & Effects
This second shortcut or tip is called the Chain Function in audacity. Here's how it works.
Whenever you are editing lots of existing audio files or if you have lots of separate audio files to record, it stands to reason that you will want them to sound the same, in most cases anyway. You will want the same volume level, the same compression level, the same equalization or the same amount of Reverb on each suitable to your particular voice.
To make all of your tracks sound the same instead of making the changes to each individual track each time, you can create a chain that automates the production process for you.
So let's say you want to add the following effects to your audio files.
- Normalize (Set volume level to Zero Db)
- Compression (Sound compression)
- Equalization (Set the graphic equalizer)
- Noise reduction (Remove background noise or hiss from the track)
Using your first audio file as you recorded using the method described here. First set the volume level through the normalize function. Then set the compression level followed by the EQ settings and then create a noise reduction profile.
You may want to create default presets for each of your effect settings. Once you have done that creating a chain to automate all of your recordings is simple, whether you still need to make recordings or you want to enhance recordings you already have completed.
Here's how to create a chain.
1 - Creating Your First Chain
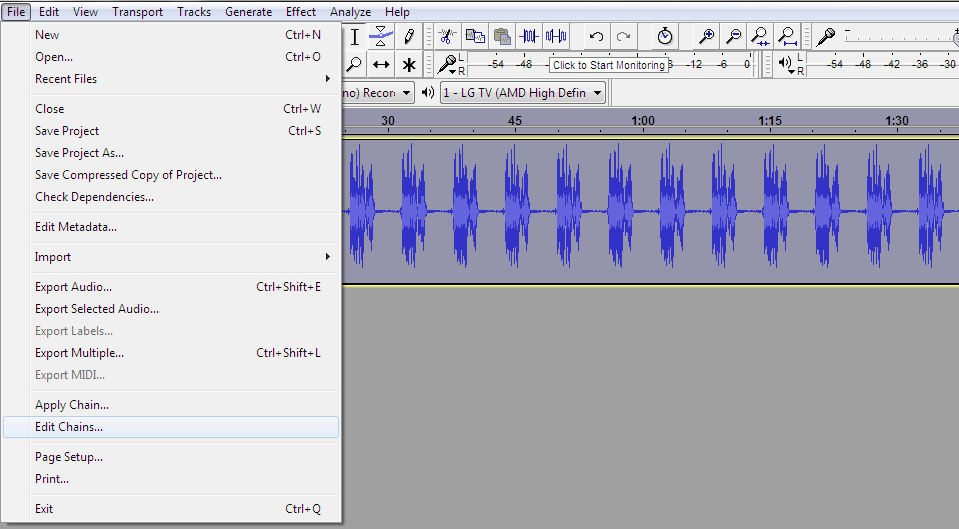
From the files menu choose the Files -> Edit Chains menu item.
Adding A Chain
From the window that opens up you can create your own chains or change the default ones. In our case we are going to add a new chain so click the Add button in the bottom left corner and enter a name in the enter "Name Of new Chain" field that pops up.
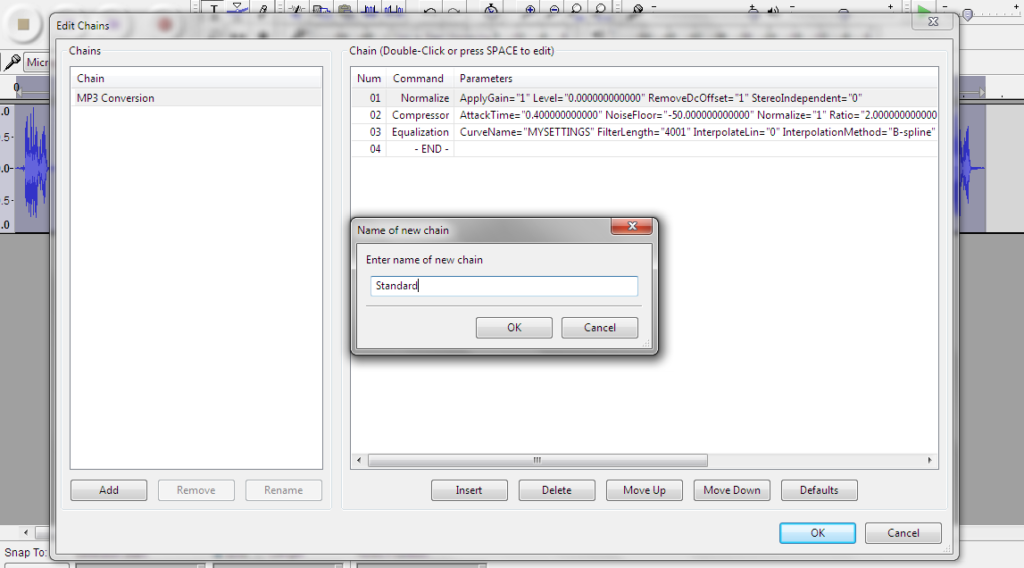
Choose something like "Standard" or another generic word you want to use for your General production settings.
Adding The Normalize Effect To The Chain
You can then begin adding Effects. Start by adding the Normalize Function by clicking "Insert".
You can then choose a preset you have already made or edit the parameters if you know what the preset settings you want to use are. You can also use the default settings. Normalize is usually set to 0.0 or Zero Db and so we can just choose the default settings.
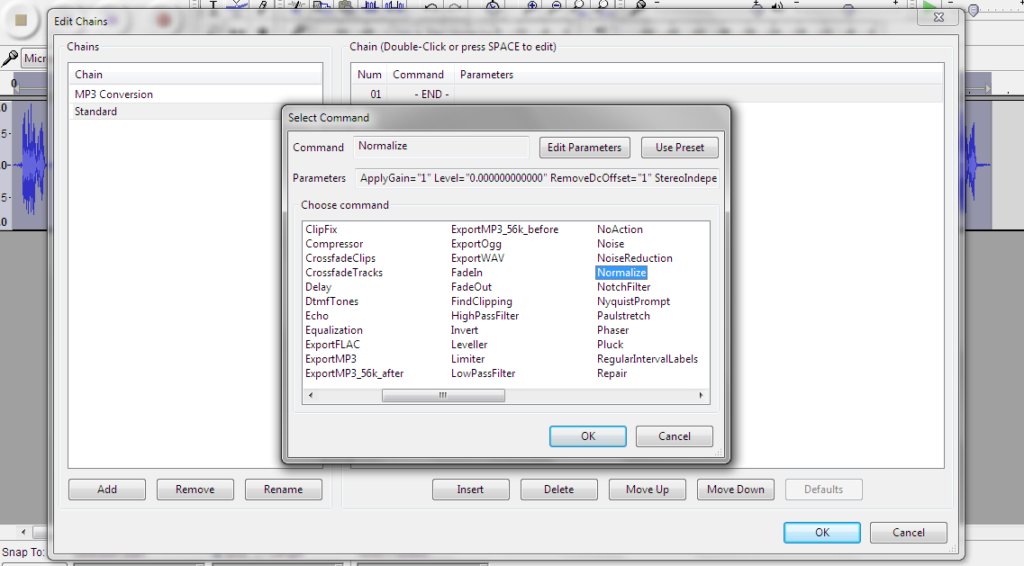
Then click OK and your first chain event has been inserted into the chain.
Add Compression To The Chain
Now add the Compression. Click Insert and choose the Compressor function.
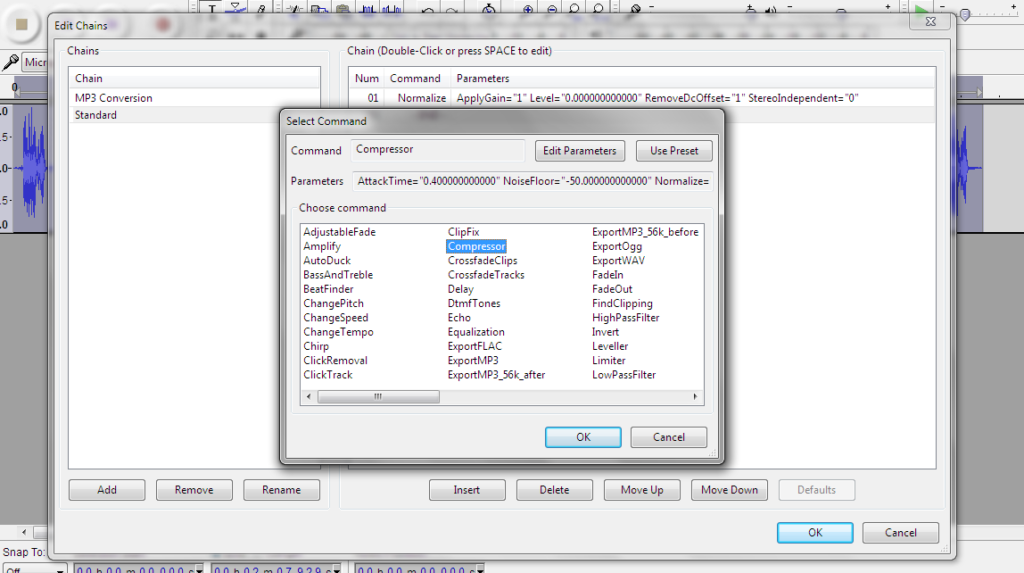
Again you can change the parameters or choose a preset you created earlier. Then click OK and now you have two events or functions in the chain.
Adding Equalization To The Chain
Next add the EQ Effect. Click Insert again and add the Equalization function.
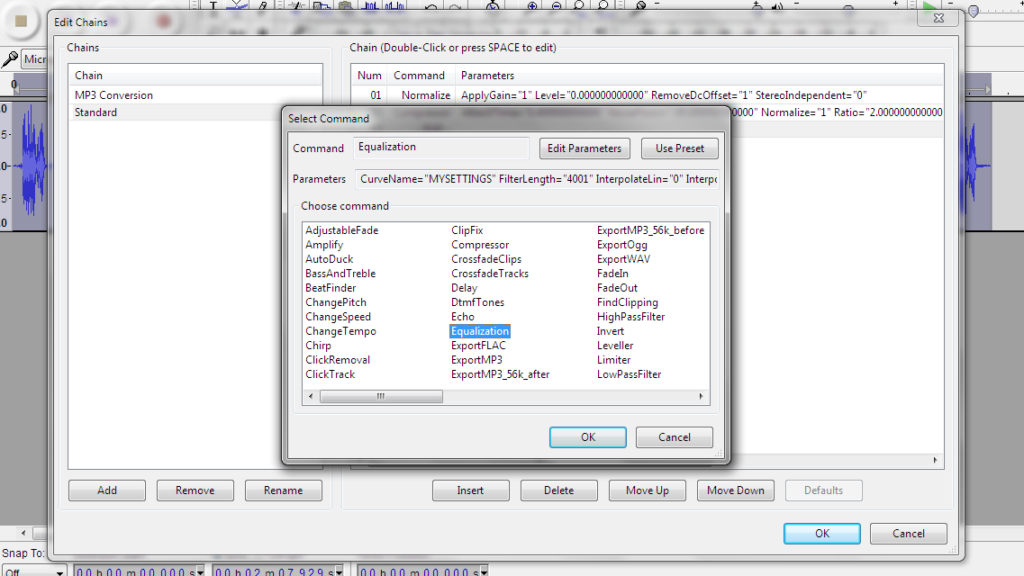
Again choose a preset or make the required changes to the parameters. And again click OK to insert the Equalization function into your chain.
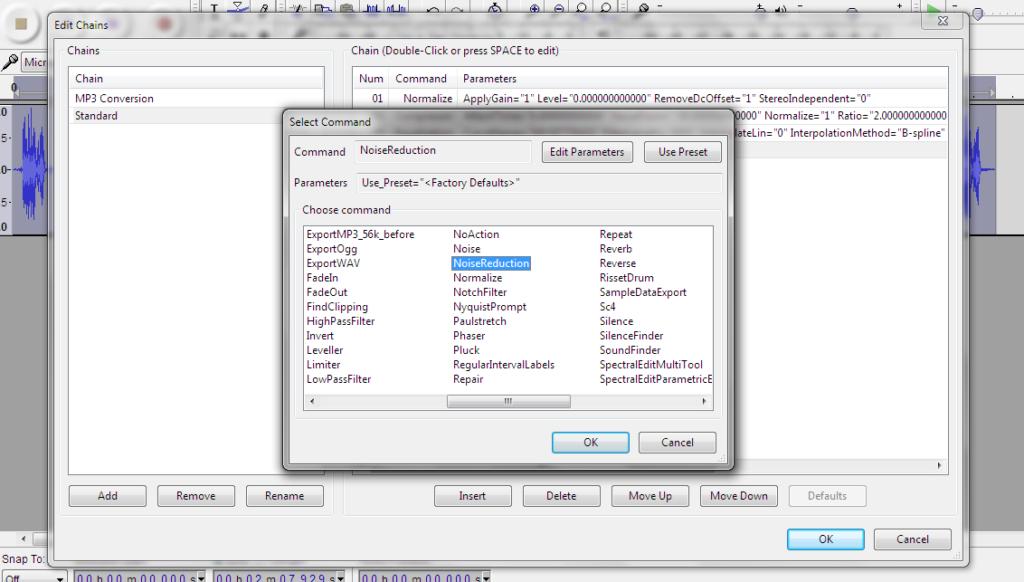
Adding Noise Reduction To The Chain
To complete our chain we will add the Noise Reduction function.
Click Insert, choose Noise Reduction and choose your preset before clicking the OK button.
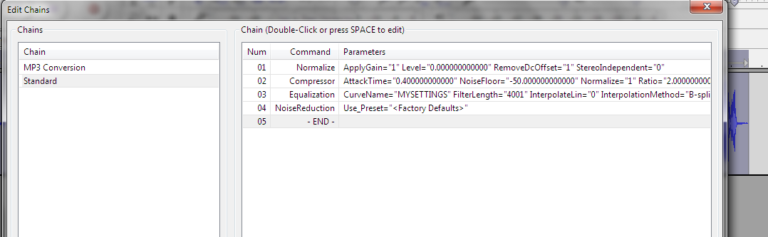
Your chain should now contain all of the effects we just added as seen in the image below:
At this point, let me just add that from the effects we have added to our chain so far in this section, the default settings are usually enough. It is only when you have specific desires regarding your recordings such as compressing high or low pitched sounds in your audio recordings or adding specific amounts of Reverb that you will need to go more in-depth into creating each Preset for a particular function, whether that's Delay, Reverb, Compression or any number of effects you might want to add to your audios.
2 - Applying the chain to your audio files.
Now that you have created a default chain (or set of effects) you can apply the chain to your tracks. To do this, simply select the track by clicking the left side of the track window to select the audio track. Then goto Files -> Apply Chain then choose the Chain you created and named earlier. In our example this is the "Standard" chain.
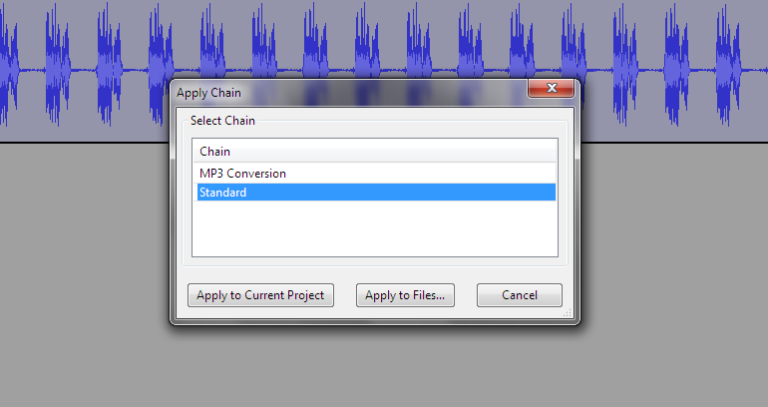
Click the "Apply to Current Project" button and the chain of effects or options is applied to your audio track.
3 - Applying the chain to multiple files.
If you have recorded several files already, you can choose the "Apply to Files" button then select several files from your desktop or other location on your PC. Once selected, audacity will:
- Open each file you selected.
- Apply the chain to the file.
- Exports the new file.
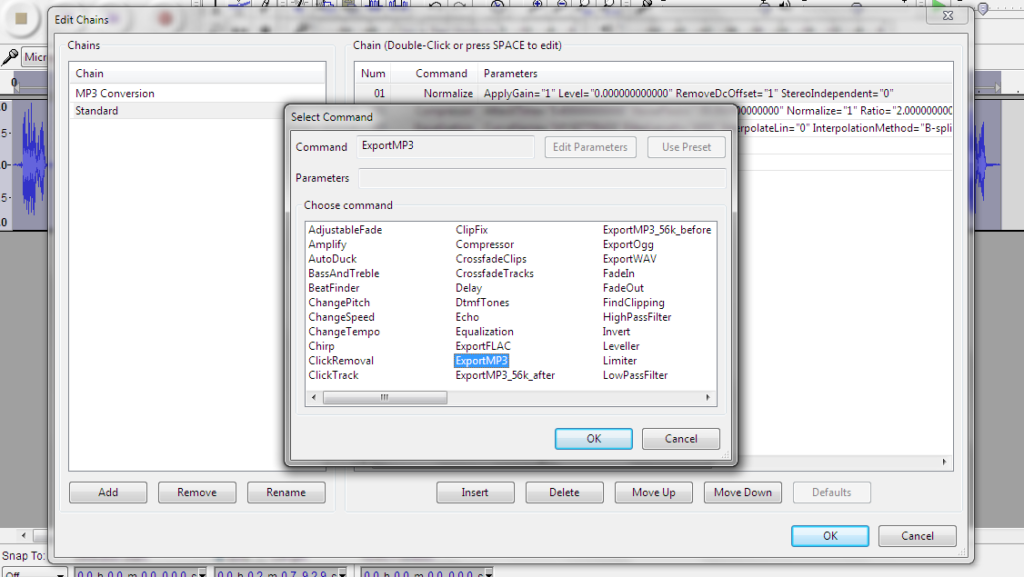
But... Please note: Applying a preset Chain to a set of files requires that the end event in a chain is the "ExportMP3" effect/event, so make sure that you Insert the ExportMP3 function into the end of your chain sequence.
The new altered files will then be exported to a folder called "cleaned" within the original files folder.
Conclusion
That about covers the chain function which can save you a lot of time if you have multiple files to record or edit by adding various effects to each.
Just make sure to create your presets for each Effect before adding them to a chain so that you can add the Preset Effect to your chain for perfect replication of your audios.
I hope you enjoyed this short audacity series, if you did please add a comment and i will try to answer in the swiftest possible time. And don't forget to share this post.
Thanks for listening.