


In this post I am going to take you through a simple process to create "power commands" as I call them. You can go through the same process to create affirmations or for any other audio recording you may need to create. An audio book or interview for example.
This post may seem a little disjointed as it forms part of a Self Improvement program I am currently developing and is instructing the student on the process of creating commands to the subconscious in order to eliminate bad habits and addictions. Throughout the video and text below I am using Stopping Smoking as an example but you may use this process to record any audio you want to as already mentioned.
The process is simple but I have broken it up into parts here for you to go through the step by step process in order to produce a finished audio file. So let's get to it...
1 - What You Will Need:
- A Microphone
- Audacity
To begin create affirmations or commands in .MP3 format so that you can listen to them throughout the day and/or night you will need to use your microphone to record into audacity (on your PC) and create your commands, that you will then either play from your PC or create a CD or use another methods of playing .MP3's.
MIKE TEST:
First plug your mike into the mike input on your PC. Usually called LINE IN.
Next right click the speaker icon in the task bar notification area. (bottom right of your desktop)
Then choose recording.
From the list of available devices choose the audio input for your mike.
You can test each until you get a signal. Then make a note of the device name.
You should then be able to see the volume signal meter move as you speak into the mike.
Once you have a signal you can move onto the next step.
Play some music to find your playback output device.
If you can hear the mike coming out of your speakers then your current playback device is OK.
You will then need the names of the recording device and the playback device outlined in the next step.
2 - Installing Audacity:
Once you have your mike working and you know your audio recording and audio playback device names the next step is to download and install audacity.
Of course you can skip this step if you already have it installed.
Begin by opening your web browser and type audacityteam.org in the address bar. or of course you can click the link just given.
This will take you to the audacity website where you can download the software.
You should then be able to see a download link, if not, scroll down the page until you find it. You may have to visit the download page. Click the link to download the software for your system.
If you don't see a download link click the download tab in the top/side menu and choose audacity for windows or for your current operating system.
Choose the audacity installer and begin the download.
After you have downloaded the software find it on your hard drive, or in your download folder and double click it to run the install program. Then simply follow the installation instructions.
It is simple to install just follow the steps after clicking the audacity.exe file.
When you are done installing the software click the audacity desktop shortcut.
(the install sequence should place the shortcut on your desktop).
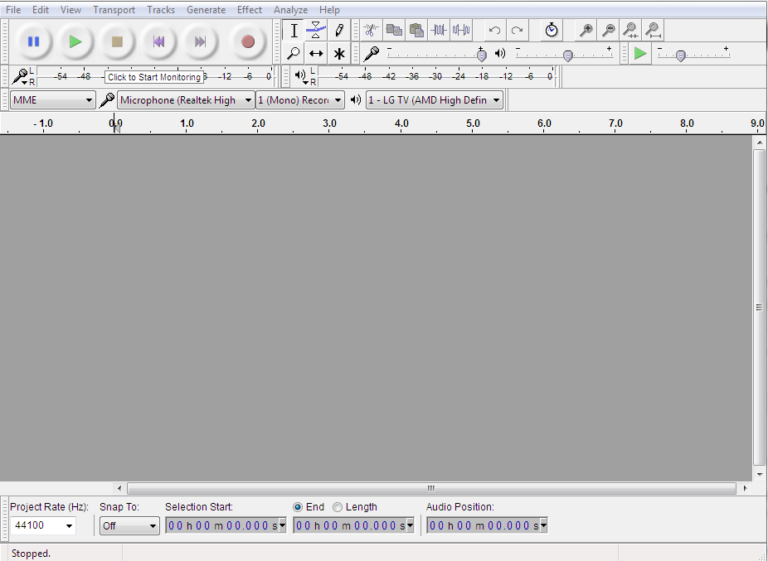
When the program starts you should get a splash screen.
Check the tick box and Click OK.
You should now have a screen something like this:
3 - Initial Audacity Settings:
Before you begin recording the commands you first need to make a few setting changes.
To do this go to:
EDIT -> PREFERENCES ->
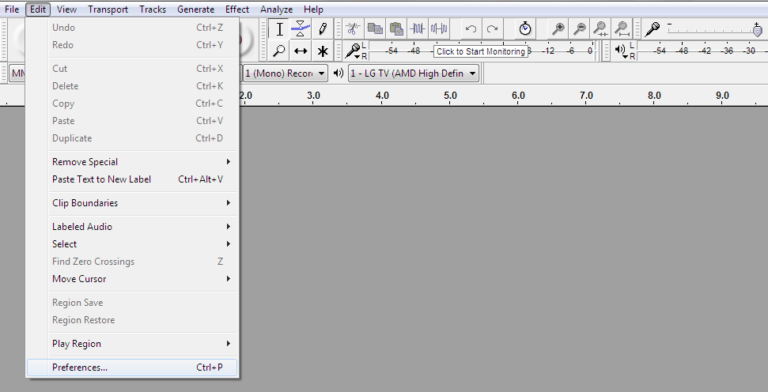
After you click on the preferences option a window will open up as seen below.
On this first screen choose your playback device and your recording device. From the drop down menus.
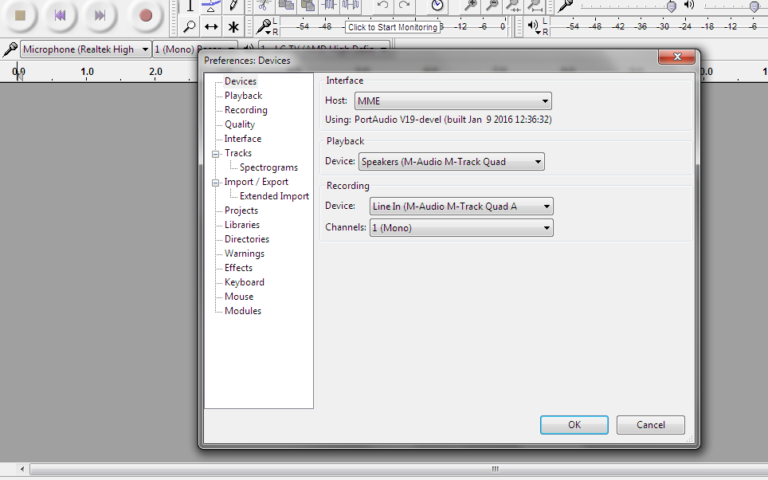
I have the M-Track audio interface coming INTO my workstation and so will choose that as my playback device so I can use headphones to monitor the audio during playback of any recordings I make.
I will also choose the M-Track audio interface as the recording device because that is where I have my mike plugged in.
You just need to choose the LINE IN device depending on where your INPUT signal is coming from.
NEXT Choose mono as the channel setting. This will give you a much thicker sound as you are using only one mike to record.
You can then go to the "quality tab" and set the sample rate audio quality.
Make sure the default sample rate is 44100 and the bit rate is 32 or 24 is good.

Once you have made your settings click OK.
And you are almost ready to begin a recording.
4 - Creating Your First Recording:
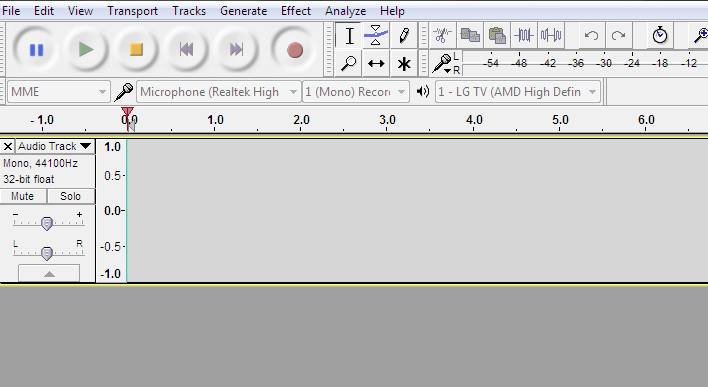
Click the pause button to put audacity into standby mode.
And an audio track is created ready to record onto.
Then click the record button and an audio track is created ready to record onto. - Audacity wont begin recording until you click the pause button again to un-pause the recording. You can pause at any time simply by clicking the pause button.
Now when you speak into your mike you should get a green signal.
You will be able to see the volume signal coming into your mike as seen in the image below:
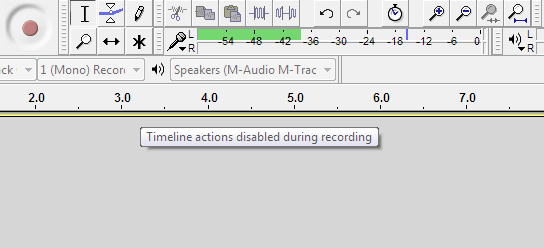
If you don't see a signal you will need to go back to step 1 and step 3 to make sure that your recording and playback devices are correct.
When the signal looks OK record your first command into audacity like so:
- Make sure you have the command written down in front of you then click the PAUSE button again and audacity will begin recording.
- Speak the command out in a soft but firm voice. In a commanding way but not forceful or loud.
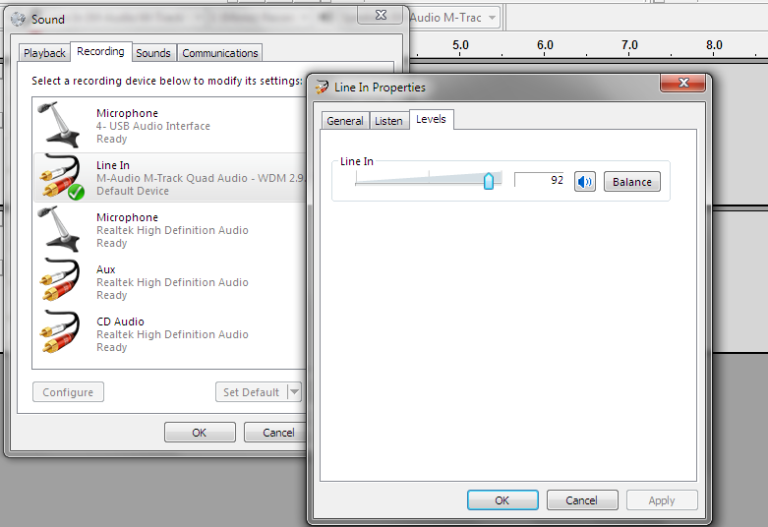
- You may have to make a few test recordings to get a goos recording level. You may also need to adjust the input volume so that the sound isn't distorted.
To check the input level simply right click the speaker icon in the bottom right of your task bar and choose Recording devices. The click on your input device then in the new small window that opens (the Line In Properties dialogue) click the LEVELS Tab. You should then see the meter to either decrease or increase the input level as shown below:
When you are ready....
Click pause, then click the record button and your ready to begin recording your first command.
When you have the command at hand and are ready to record it click the pause button to begin recording.
Don't forget to leave a 1 or 2 second gap before you begin speaking into the mike. (count silently in your head for this).
Speak your first command into the mike in a firm but soft voice and then click the pause button again to stop recording.
You can then click the stop button when you have finished recording.
You have now got your first command or affirmation.
**************************************************
Next you need to SAVE your command as an MP3 file.
Click the FILE Menu -> Export (and choose to save as an MP3 file).
Name the file something like stop smoking 1 or similar, depending on what your projects is.
To make sure you keep your files organized save each of the files into a folder called commands or stop smoking commands or something similar.
Once you are done saving your first command you need to repeat step 3 for each of the commands you want to record. or each audio you want to record.
Once you have all 10 commands you can move onto the next step set, or next audio.
5 - Producing The Commands:
SOUND QUALITY:
If you haven't already, open audacity and open your first command by clicking FILE -> IMPORT -> AUDIO... and choose your first command or other audio recording.
When the file is imported...
Select the audio file by clicking the left side of the track area. Alternatively you can go to: Edit -> Select - > All
...and then goto:
EFFECTS -> NORMALIZE and set it to 0.0 and click OK.
Next goto:
EFFECTS -> COMPRESSOR and make sure that this: "make up gain for 0db after compressing" is selected and click OK.
Next make sure the audio is selected and goto;
EFFECTS -> REPEAT and type 20 times.
This will set the audio command to repeat 20 time.
It is best if there are a few seconds between each command as I mentioned when you count to 2 in your mind before speaking into the microphone for each of the commands.
6 - SAVE The Commands:
When you have done this goto:
FILE -> EXPORT and save the MP3 file over your original command. Or in a different location if you prefer.
I usually save the file in a different location.
7 - Repeat Step 5 and 6 For each Command:
Now you need to repeat step 5 and 6 for each of the 10 commands.
Don't worry that this may sound complicated. It is really simple once you understand what you are doing.
Follow the instructions slowly with the first command and then move onto the next and so on.
You will eventually get into a flow and begin to make these commands second nature in no time at all.
see the video for a live example of what we have been talking about here.
FINAL
Once you have completed the first set of commands you should play the audio in the background as you do your work and at night as you sleep.
These commands will most likely begin to work for you in a couple of days but may take upto 6 weeks to notice the difference depending on the purpose of course.
If at any time you begin to get headaches, stop listening and have a couple of days rest from the commands and then begin again.
IMPORTANT:
These commands work.
If you don't see results after a few weeks re-record the commands and persist to create the commands and eliminate your negatives whatever they are. It is your persistence that eventually wins through. During this process you are continuously telling yourself by your persistence and BY YOUR ACTIONS that you want to stop smoking or remove some other negative habit.
You will then begin to bring yourself and every aspect of your mind into cooperation and you will eventually eliminate the habit.
I hope this helps you to eliminate every negative habit, experience and addiction you may have.
Thank For Listening.